Loading... Please wait...


- Home
- WATER AEROBICS EXERCISES
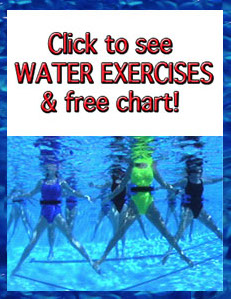
- FREE WATER AEROBICS EXERCISES & CHARTS
FREE WATER AEROBICS EXERCISES & CHARTS
 Welcome and thank you for visiting our site!
Many of you have purchased our WaterGym® Belts and have asked for some exercises to do with the belt. Below are a few of our favorites.
Also, if you want to burn more calories and maximize your results from your water aerobics workouts, check out our workout tips and charts below. There's nothing more frustrating than putting out honest effort and not getting your desired results.
More to come! In the meantime... have fun in the pool! ~ Susanne

WATER AEROBICS EXERCISE #1
- How to Water Run -
Now that you have your new water belt- here's how to water run! Deep water running has become very popular over the last decade because studies have proven that water running gives all the benefits of land based running without impact or joint stresses. Many of us can't run on land, but we can run in the water. Here's your intro to this fabulous sport!

WATER AEROBICS EXERCISE #2
- How to Bike in Water -
Biking in the water is like taking a spin class - but cool! We love to couple biking with High Kicks because this combo really targets the hamstrings and glutes, kicks out the heat, feels good and is fun!

WATER AEROBICS EXERCISE #3
- Burn Calories - Run and Flutter! -
Now we'll pick up the pace and focus on fluttering and water running combined. Super fun and you can really feel the burn!

WATER AEROBICS EXERCISES #4
- Stationary Flutter Power Move -
This full-bodied exercise uses a flutter leg and varying arm moves. Stay vertical and really feel the resistance against the full surface areas of both your arms and legs.

WEIGHT LOSS & STRENGTHENING TIP #1
- Water Aerobics Weight Loss Tips -
Water can be a powerful workout environment to burn calories and get in fabulous shape! Here are some helpful tips!

Ethical Bribe Alert!
We'd love to have you as part of our community!
We have lots of fun exercises, tips and specials coming and would love to share them with you.
So if you join our list, as a thank you, we'll immediately send you a link to get the following charts.
Please see our PRIVACY POLICY to understand who we are so you know we rarely send out emails.
Simply enter the your name and valid email into the BLUE form
(bottom of page-says JOIN US FOR WORKOUT TIPS).
Once you click SUBMIT, you'll get an immediately email after with a link to the charts.
Thanks for visiting our site! We appreciate you!
WATER AEROBICS CHARTS TO MAXIMIZE YOUR RESULTS!
- Calorie Burning & Precision Charts -

- WaterGym® Calorie Burning Chart -
Have you ever wondered how many calories you are burning during your water aerobics workouts? Our WaterGym Workout Intensity Chart gives you your different workout levels, how many calories you're burning, what you are burning for fuel (protein, carbs or fat) and more. It is also the first chart to combine all 3 ways of monitoring your workout intensity into one chart; heart rate, perceived exertion and "talk test". Included with the chart are the first 12 pages (only) of our WaterGym Workout Intensity Ebook to get you started with a few basics on using the chart.
- WaterGym® Stroke Analysis Chart -
The quality of how you move or "stroke" your limbs through the water makes or breaks the results of your water workouts. We created a STROKE ANALYSIS CHART to help you understand your movements in water, because the more specific you are, the more you strengthen the targeted muscles and burn calories. It's all about truly feeling the resistance on the surfaces of the limbs to get your desired results!